Can you tell that Green is my new Orange?

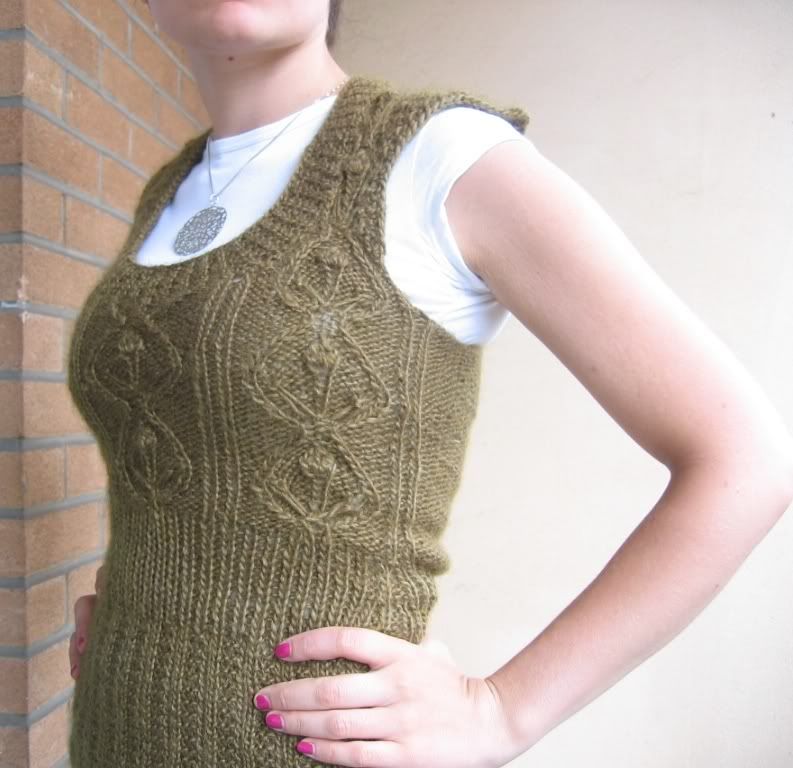
Pattern: Lucania (based on a vest I saw in Anthropologie ages ago)
Yarn: a few balls (3.5?) of Patons SWS
For the negativity first (hold fast, there is some positivity later!):
Not so damn keen on the Patons SWS after all. Unpleasantly itchy, and split/frayed far too much for my liking. Defo won't be using it again for a wearable knit. Maybe a chew toy, for a dog (who I don't like... get his/her mouth full of itchy, itchy green).
Sadly, this itchiness only dawned on me when I was more than half done the vest, and so, refused to turn back and frog. On the up-side, this is a layering item, so won't really touch all too much of my skin anyhows.

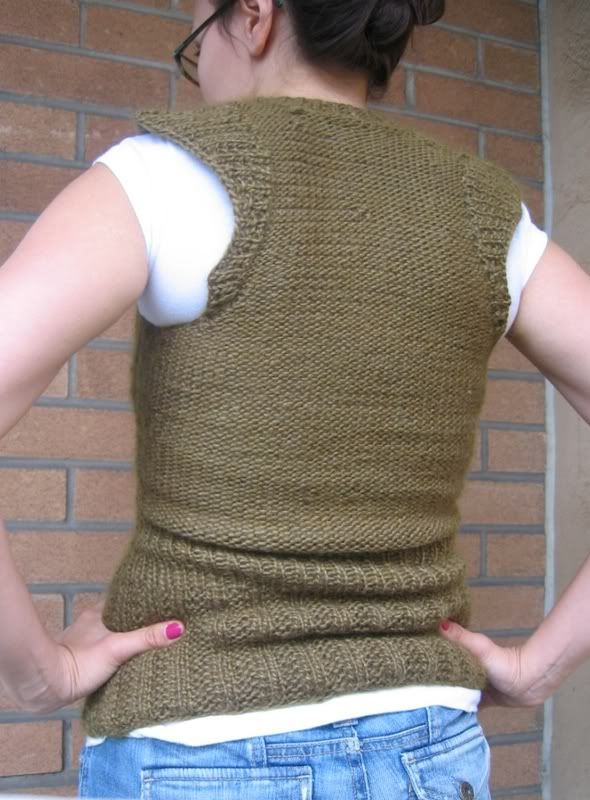
Second smattering of negativosity: due to this unfortunate itchiness, I sort of gave up hope on this knit's last legs, and didn't make the armholes as deep as I would have liked, and did a terrible job of the sleeve cap thingys. I had a total brain fart and didn't do the ribbing all the way around the armhole, which of course would have been logical. Instead, I opted for what I believed to be a short road out of PatonsLand, and did a sort of half-sleeve thingy...
Which, when viewed from the back, makes it look like I have big fat loaves of bread squeezing out the top of my bra-sides under those sad ol' arms.
That out of the way:
On the positive side, it mostly turned out how I wanted, and if I had actually picked up all the armhole stitches, instead of taking my easy-way-out approach, the vest would have had great little short-row shaped sleeve caps, just as I originally envisioned (I feel like a pompous gasbag whenever I saw "envisioned" - if anyone has a good substitute word, I've love to insert it there. I'm not a pompous gasbag, I swear. I'm actually quite self-effacing, lacking in confidence with a high degree of losery thrown in. Shit, is my insecurity showing much?)
Dammit! This was the positive paragraph.
Let's try again:


I love how wonderfully Anthropologie photogs their clothes. So very imitatable. I think I replicated the correct double-garter rib and regular old garter rib for the bottom half of the vest, and the flower (a great little gem from Barbara Walker's Second Treasury) is a decent replica of the flower on the Anthro vest. I did have to add those little diamond-walls enclosing the rose, though.

I also think that given my a/c overloaded summertime environment at work, this vest may see some action in the near future. I like to wear an FO as soon as possible once it's completed! Even the comme ci, comme ca ones like this.
And, to send out some more good vibes: I'll be casting on for the second Corona within a day or two. Not sure if I'll do a total replica of the first, or if I'll change up the cable, and perhaps do the much-ado'ed over Kangaroo pocket.
I'm very excited about knitting these days. I think it's the Rav-monster that's bit me.
That's the best monster EVER. Even better than this guy, who I understand is on a health-kick and is now much more concerned with fruit and veggies.
Yeah nutrition!

***Pattern Notes***
Yarn: something like 3.5, maybe 4 balls of Patons SWS
Needles: 4.5 mm circular
Size: to fit 35" ish bust
Gauge: 4.5 sts=1"
I can't include the cable pattern, since that would be wrongity-wrong (you can find it in Barbara Walker's Second Treasury of Knitting. I believe it's called Rose Garden).
Cast on 120 sts and work in the round.
Working in double garter rib, knit until piece is 5.5 inches from cast on edge.
DOUBLE GARTER RIB:
Row 1 - K2, P2, repeat to end.
Row 2 - K across all sts
Repeat these two rows.
When piece is 5.5 inches from cast on, you begin to decrease for the waist, and switch to single garter rib. I decreased down to 100 sts.
SINGLE GARTER RIB:
Row 1 - K1, P1, repeat to end
Row 2 - K across all sts.
When piece measures 8.5 inches from the cast on edge, begin the flower section.
The background is reverse-stockinette, so you'll be purling all the sts that are not the cable detail. I repeated the cable 3 times across the front, and here's how the numbers work out:
15 sts across - middle st is where the stem of the rose is placed. The little surrounding bubble curves out around the flower stem, moving from 1 st away at the bottom to 6 sts away at the widest part.
The whole cable is worked over 17 rounds.
There's also a K1-P1-K1 ribbing row separating each cable section.
My wording of this is rather confusing (at least, it seems so to me!) It's probably just easier for you to look at the photos.
When you've done half a cable repeat (so, that's about 1.5 inches), begin increasing for the bust.
Increase back up to 120 sts.
Arm holes and Neckline:
They both begin at 16" up from the cast on edge. For the arm holes, I just cast off 6 sts (and of course, had to begin working back and forth instead of in the round). For the neckline, I put the centre 17 sts on a stitch holder.
Over the next few rows, I decreased one st each on either side of the neckline and armholes. At its thinnest, the front panels are decreased to just 15 sts. This makes the 2 cable panels pretty cramped, so I'd suggest leaving a few extra sts on there for your own sanity and ease of knitting.
The armholes are 8.5" long. When you reach this number, you can graft the front and back panels together.
Oh yes, and here's what I did for the back:
Kept knitting up until the armholes were 7" long. Then I put the centre 17 sts on a holder, and decreased on each side of the newly created neckline until each back panel has 15 sts, to match each front panel (again, I'd suggest adding a few sts here).
Picking up for Ribbed Neckline:
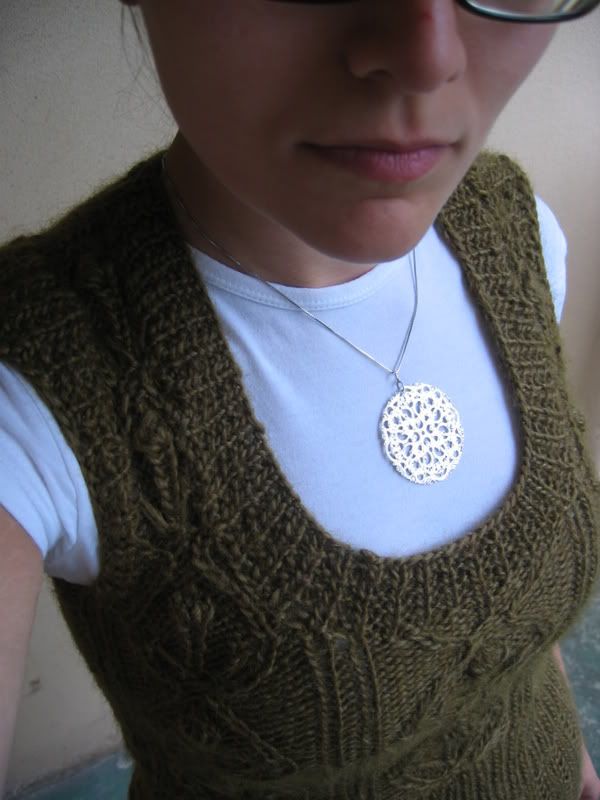
Pick up every 3 out of 4 sts along the neckline, and knit (in the round) single garter rib until the neckline is about 1.5 inches wide. Cast off on Row 1 of garter rib. That way the sts sit a bit nicer that if you just cast them all off knit-wise.
Arm-caps:
I truly don't recommend doing these the same way I did, so I'll give you what I should have done instead.
Pick up edge-sts of armhole, and do 1 round of single garter ribbing. Mark off, on each side of the armhole, the spot that's about 1.5 inches up from the bottom of the armhole. That's where you'll start short-row shaping so that the cap does a little cappy thing and curves outwards towards your shoulder.
What I did for the short rowing: from this starting point of 1.5 inches up from the bottom, I began knitting flat, working back and forth across the arm, knitting 2 sts less each side.
When the cap is about deep, start working in the round again and pick up all your wraps along the way. Do another complete round, and then bind off.

9 comments:
Looks great, even without the ribbing all the way around the arm holes!
The rumors are greatly exaggerated... the C-Monster still eats LOTS of cookies!
I love that vest, and the armhole/sleeve caplets are easily fixed the next time around. I hear you on the Patons, I've always found that yarn so scratchy!
I'm impressed with how accurate you got that Anthropologie vest! I'm thinking of doing something similar soon, with a Stella McCartney dress I saw....
- Julie
What a great vest! I think the armholes look just fine -- but if you're not in love with them, with the vest as a layering piece, I assume they'll be hidden under a jacket anyway. The vest is extremely cute, and like Julie I am also very impressed by how similar it looks to the Anthropologie inspiration!
Thanks so much :)
A jacket - why didn't I think of that :p That would solve the oogly arm-caps without having to knit.
Julie: Looking forward to seeing the McCartney piece!
And the SWS is gonna pill like a bitch. No more SWS ok?
Good vest though. What did I tell you about sizing? I'm gonna boycott your blog unless you get a little more fat-friendly....
That is so close to Anthropologie's version! I'm sure the next version will be a complete winner (ix - nay on the itchy yarn of course).
Nice vest! It looks great on you
I love the neck line - uber flattering! I'm impressed you hung in there until the finish. Congrats!
Post a Comment