
I'd like to announce to the knitworld that I love Manos Silk.
Here's what it told me to make it into:
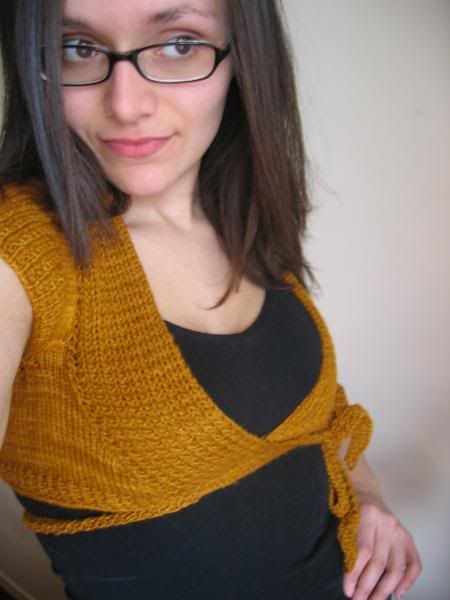
Pattern: Hew (available as a pdf download on Ravelry. I have, rather unfortunately, not figured out the delicate art of pdf-ing).
Yarn: 2 skeins of Manos Silk
This pattern was a bit of a departure for me. Usually I think on a design for quite a while, sketching and dreaming. Hew just grew itself, in a manner that I'm certainly not used to when it comes to knitting. It was a very organic process, which brought me to a wearable and rather enjoyable finished garment.
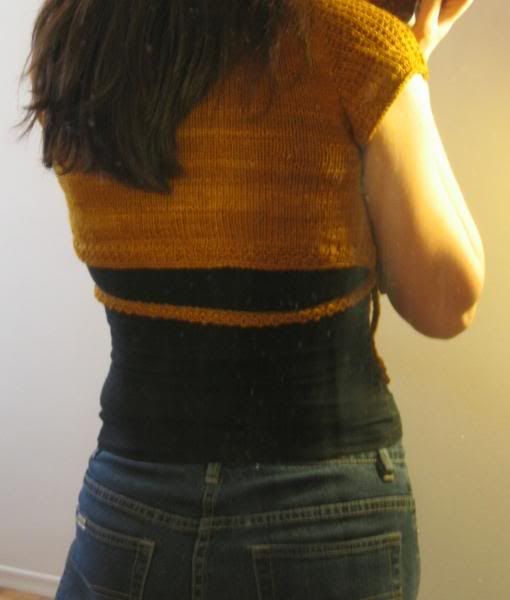
My issues: because it was such an 'organic' knit, it's a bit loose in some areas and a bit tight in others. It sort of works out, but I've found myself tugging at the bottom edge and re-tying the ties every once in a while to keep it below-bust.
I've kept pattern notes this time, so I hope I can accurately tell you knitgentry (for this I shall title you) how it grew and how to make it grow for other sizes.
Here's what it told me to make it into:

Pattern: Hew (available as a pdf download on Ravelry. I have, rather unfortunately, not figured out the delicate art of pdf-ing).
Yarn: 2 skeins of Manos Silk

This pattern was a bit of a departure for me. Usually I think on a design for quite a while, sketching and dreaming. Hew just grew itself, in a manner that I'm certainly not used to when it comes to knitting. It was a very organic process, which brought me to a wearable and rather enjoyable finished garment.

My issues: because it was such an 'organic' knit, it's a bit loose in some areas and a bit tight in others. It sort of works out, but I've found myself tugging at the bottom edge and re-tying the ties every once in a while to keep it below-bust.

I've kept pattern notes this time, so I hope I can accurately tell you knitgentry (for this I shall title you) how it grew and how to make it grow for other sizes.

Hew
By CanarySanctuary
http://canaryknits.blogspot.com
Size:
Bust 34 (36, 38, 40, 42, 46, 48, 50, 52, 54)
Materials:
Manos Silk 2 (3, 3, 3, 4, 4, 4, 4, 5, 5)
4 mm circs (16” or longer)
Gauge:
5.5 sts / 1” on 4 mm needles
Pattern Notes:
Garter Rib: RS – K1, P1 to end
WS – P all stitches
This garment is constructed as a top-down raglan, with minimal seaming.
**Note: please be understanding. This is the first pattern I’ve attempted to size!
Pattern:
Cast on 96 (102, 114, 128, 132, 146, 150, 168, 168, 182, 182) sts.
Knit across 6 (6, 8, 10, 12, 12, 14, 16, 16, 18, 18) place stitch marker, knit in garter rib 12 (12, 16, 18, 18, 22, 22, 26, 26, 28, 28) place marker, knit 60 (66, 66, 72, 72, 78, 78, 84, 84, 90, 90) place marker, knit in garter rib 12 (12, 16, 18, 18, 22, 22, 26, 28, 28) place marker.
Arms are now marked for raglan increases.
From now on, do raglan increases in the manner written below until stitches for back number 82 (88, 90, 94, 96, 98, 98, 100, 100):
Raglan increases:
Knit across 6 (6, 8, 10, 12, 12, 14, 16, 16, 18, 18), slip the marker, increase 1, knit ribbing across arm stitches until one stitch before marker, increase 1, slip the marker, increase 1, knit across back stitches until 1 stitch before marker, increase 1, slip the marker, increase 1, knit ribbing across arm until one stitch before marker, increase 1, slip the marker, knit to the end.
When you have the number of stitches for the back, continue increasing for the arms (but not for the back!) until they fit comfortably around your upper arm.
When the arms fit around your upper arm:
Knit along front 6 (6, 8, 10, 12, 12, 14, 16, 16, 18, 18), slip the marker, cast off all arm stitches, take off second marker, knit across back, slip marker, cast off all arm stitches, take off second marker, knit until the end.
Increasing for bust:
Right Side Rows: Knit 1, increase 1, knit across all stitches until 2 stitches from the end, increase 1, knit 1.
Wrong Side Rows: Purl.
Work in this manner until number of stitches for front are 22 (22, 32, 32, 44, 44, 56, 56, 66, 66, 78).
***KEEP TRYING ON THE GARMENT to see how far it’s coming down your bust.
When you put the shrug on and it comes down 1 inch below your bust, begin the ties.
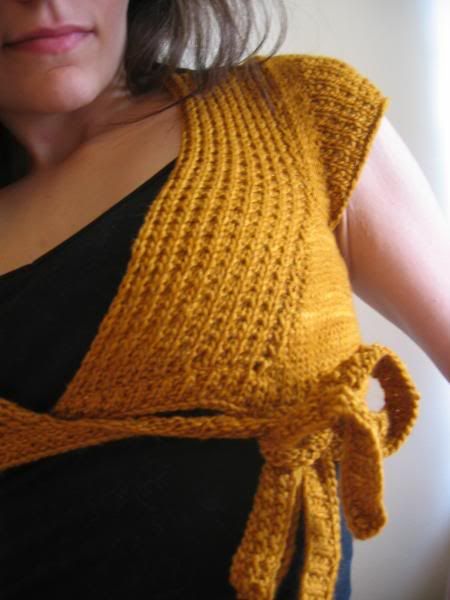
Ties:
With the RS facing, cast on 200 (206, 212, 224, 224, 230, 236, 247, 247, 260, 260).
Work garter rib across to end. Cast on 100 (103, 106, 112, 112, 115, 118, 121, 121, 124, 124).
From this point on, work garter rib, decreasing one stitch at the end of every row.
When the ties are 1 (1, 1, 1.5, 1.5, 1.5, 2, 2, 2, 2) inches wide, cast off all stitches.
Neckline:
Work entire neckline in garter rib.
Pick up 20 (20, 26, 26, 32, 32, 38, 38, 44, 44) along top of left tie.
Each RS row, pick up one stitch from edge of neckline and knit it together with first stitch of garter rib.
Work in this manner all the way around the edge of the neckline until you get to the right tie.
Finish off by grafting/Kitchener stitching the garter rib neckline to the top of the right tie.
11 comments:
VERY cute! I'm looking forward to the pattern (like doesn't work currently, not sure if it's supposed to). I wonder if you could weave a bit of elastic thread through the bottom part to help with the problem you're having needing to readjust it?
Thanks!
I need to figure out linking, because several of them are broken :p
Damn pdfs!
I think you're right about the elastic. I need to get my hands on some of that.
*off to fix bad links!*
Oh wow, I love it- what a perfect little knit for layering in the summer! I'm going to go add that to my ravelry queue right now.....
- Julie
That's so cute!!
Very pretty.
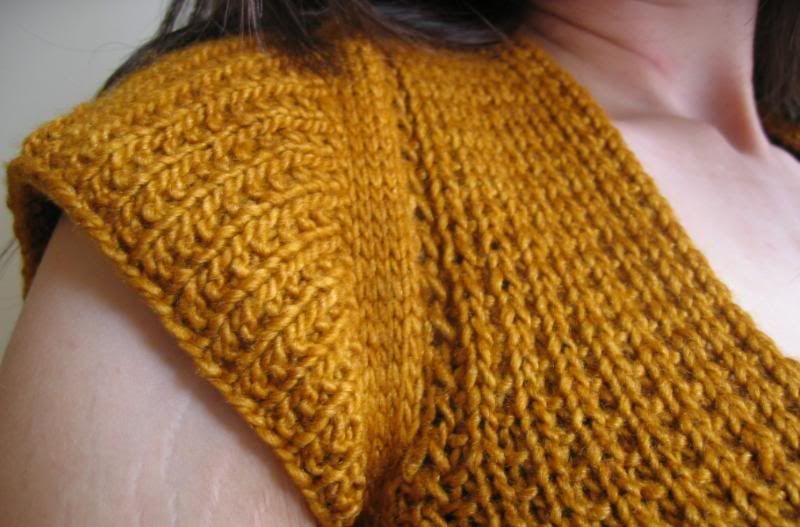
It looks great! The stitch definition is fantastic. :) Definitely on my to-do list!
Hey! First of all I love this and have just started trying to make it. I've never done a top down raglan before. And I have a question, when doing the initial raglan increases- do you just purl the WS rows and only increase on the right side rows?
Thanks so much! Love your work!
Heather
Thanks so much!
Yes, you only purl on the WS rows, and do the increases on the RS.
Can't wait to see it completed :)
Great pattern [unsuprisingly.] =] I have a question: for the front piece do you work the 12 stitches as a whole or seperately; 6 stitches at a time? Thanks!
Hello Anonymous!
Which size are you working on?
The way it works is (pretending you're doing the smallest size): 6 stitches for the front, 12 for the arm (then you have the back stitches, and then the next arm's 12 sts and the other front's 6 sts).
This looks awesome!
I'm attempting to mod it to fit with Baby yarn that I got from family as a gift.
When you say 4 mm circs, do you mean 4 mm circular needles?
I started and ended up making it circular lol which doesn't look right!
Thank you!
Post a Comment